31 March 2008

Affordable Virtual Machines Benchmark

I've written an article about virtual machine (VM) for Windows before. I reviewed VMWare Workstation 6.0 and Virtual PC 2007 at that time. Now I returned with some benchmark of affordable VMs software popular in the market.The virtual machines included in the test are:

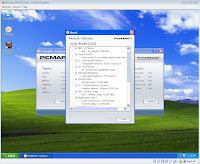
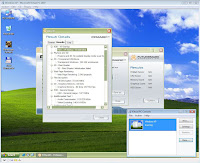
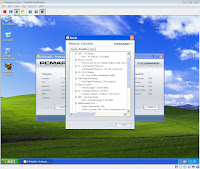
Here are the screenshots of each VM:

I didn't include VMWare Workstation because it is very expensive and not considered affordable. Moreover, this review is intended for hobbyist and beginners who only use VM personally not for IT professionals. Unlike the VMs mentioned above, VMWare Workstation is considered resource intensive and heavyweight, therefore it needs rather high-end computer to run.I tested these VMs based on its performance (shown by PCMark05), features and application compatibility. I used the same system when testing these VM, and here's my system specs:
  • CPU: Intel Pentium D 940 Overclocked ~3.60GHz (with Intel Virtualization enabled)
  • Memory: 2 x 1GB Samsung DDR2-533 (512MB Allocated for VM)
  • Video Card: EVGA GeForce 8600GT 256MB
  • Hard Drive: Seagate 40GB 7200rpm ATA133 (Where virtual machine hard drive image is located)
  • Host OS: Microsoft Windows Vista Home Basic SP1
  • Guest OS: Microsoft Windows XP Service Pack 2
Firstly, to test each VM performance, I used Futuremark PCMark05 v1.2.0. Even though all of the VM cannot produce a complete result due to lack of 3D support, I simply test some values like HDD speed, graphics performance, web page rendering, text editing, file activities, and AV encoding. For comparison purpose, I also give the host OS result as well.


*Note that blue coloured value means the best.

About basic features, each VM has its own pros and cons, below is the summary:
Virtual Machine Table 2

For me, the most important for VM feature is that it can run broad range of applications for supported OS. Too bad that none of these software can support Direct3D (However VMWare Workstation support DirectX 8.1) therefore no Direct3D game / applications can run. Shared folder is essential where you can access the host machine files from guest OS and it should have quick access. Another important feature is USB emulation so that you can simply use any USB device in your VM. While Drag and Drop ability makes copying files from host to VM become very convenient.


To see applications and multimedia compatibility, I tested each machine to run Adobe Photoshop, Windows Media Player, and Planescape Torment. The result is that every VM here can run Adobe Photoshop smoothly, there are no glitch in the cursor or while editing and saving images. All VM also passed Windows Media Player test, where each VM has to play a 3 minutes DivX movie. Although it can play media files nicely, Windows Media Player in Virtual PC cannot play media files directly from host OS. You must copy it first to the local guest OS disk in order to play.
The last test is to run an old game called Planescape Torment, it is basically a 2D RPG game and should be enough to test these VMs (considering none of them can run 3D games). The result is that Virtual PC can run it perfectly in full screen or windowed without any artifacts or oddity. In the other hand, VirtualBox can run this game perfectly but only in Windowed mode because as it is converted to full screen, there will be a black border surrounding the small game window. It is because of VirtualBox does not support changing host resolution (See screenshot below). The worst is Parallels Workstation where there are many graphical glitches in windowed and fullscreen and the sound is not working. Here's some screenshots:


Planescape Torment run in small but full screen in VirtualBox


Graphical glitch (near character photos) in Parallels Workstation 2.2

Talking about guest OS compatibility, Parallels Workstation is the most complete, followed by VirtualBox. VirtualBox and Parallels supports Windows, Linux, and Mac as the host system where Virtual PC only supports Windows and Mac. The compatibility may be the main problem for Virtual PC as it basically only supports Windows (and with little Linux support) as the host OS.

All the above VM are actually comparable in performance and all of them utilizes Virtualization technology which supported by many modern processors (can increase around 5% performance). Actually all of these VM are good and each of them have their own special features, therefore the choice depends on you. If you like your VM to support many Windows applications and games, I would recommend Virtual PC. If you need many type of guest OS and have a stable fast VM, you can try Parallels Workstation. And if you want a free VM but supports USB emulation and many basic features, you can use VirtualBox and so on.
At last, if you seek features than these virtual machines, the best choice is VMWare Workstation 6.0 because not only it includes all the features these VM have, but also additional advanced features such as debugging and of course faster performance. However it comes with expensive price (US$189) and high system resources.

Download links:


30 March 2008

Best Free Antivirus

Everyone needs a good antivirus to protect their PC from virus, trojan, worm, and many other security threats. I've seen many good antivirus like BitDefender, Kaspersky, E-Set, Panda, etc. but all of them are not free. You have to pay monthly / yearly subscription and some of them are quite expensive.

The problem is that antivirus software is so essential for every computer even if it is not connected to the Internet. Once I tried not to use any antivirus at all, and what happens is that as soon as I Googling something, I got some viruses! And after 3 days, my computer won't reboot because there are viruses that run at windows startup and prevent my windows to start, moreover, every folder in my harddisk now has a additional unknown file which replicates itself whenever I put something (like flashdisk, floppy disk) into my computer. That's why you really need a good (considered it is frequently updated) antivirus, and my additional goal is that it must be free of charge!

I found several free antivirus available on the net, they are:

  1. Avira AntiVir PersonalEdition Classic
  2. Avast! 4 Home Edition
  3. AVG Anti-Virus Free Edition
  4. BitDefender 10 Free Edition
To find which one is the best, I tested them all based on its detection ability, scan speed, new virus response, and it's memory requirements.

Speaking about virus detection, I found that Avira AntiVir performs the best, it can successfully detect around 99.60% of viruses from around one million samples. That means, it even surpassed most of the commercial antiviruses' detection performance! This result is then followed by AVG by 98.10% then Avast! with 97.60%. The last is BitDefender with 96.50%. On overall, all of the antiviruses here detects viruses very well.
And about false positives detection, Avira AntiVir again performs the best followed by AVG and with almost no false positives from 20,000 test cases. Other antivirus are performing well although some false positives are quite irritating and shocking.

Scan speed is also important especially for busy people who don't want their computer slows down too long just because it is scanning for virus in routine. I found out that Avira AntiVir again is the fastest, with only around 1 hour to finish 40GB harddisk full of files. This result is followed by AVG and Avast! with around 1,5 hour. Apparently, BitDefender is quite slow in doing this job.

A good antivirus must have a fast response by its developer whenever a new virus is surfaced on the net. Therefore I tested how fast they create a virus signature update for the program. Again, Avira AntiVir is the fastest with available updates every less than 2 hour, then followed by Avast! and BitDefender with 3 hour, and the last is AVG with around 4-6 hour.

Memory requirements also important because not every computer has memory as large as 512MB, therefore in order to keep the computer safe and not having too much space in memory (so that other programs can still run smoothly), it is better to have only small background antivirus files reside in the RAM. Once again the smallest memory usage is Avira AntiVir with only 10 MB resides in RAM.
AVG followed the second by only takes around 14MB in your memory, however this result is very different when AVG is doing an on-demand scan, it almost take 60% of your memory and CPU usage. The comes Avast! with quite high memory requirements, around 40MB (maybe it's because of the fancy skin cache). The last is BitDefender Free with 50MB, however it uses rather constant resources in on-demand scan.

The conclusion is that Avira AntiVir performs the best on all tests. It simply the best, free, and fast antivirus I found in the market. I would recommend you all to try it. In my own experience, I've used it for around 2 years (assuming your firewall is properly configured too - I used windows firewall though) and since that, I haven't had any virus problem. However, other antivirus are also good like Avast! has a very user friendly interface, BitDefender even has a skinnable interface. Avast! also has a decent adware/spyware removal.
Other free antivirus that you might want to try is Comodo AntiVirus 2.0 Beta. Although it is still in beta version, but I've heard some good reviews about it altough some says it has poor virus detection.

My recommendation is that you should combine antivirus with good firewall and spyware remover to make sure your PC is completely safe from any malware threats.


28 March 2008

Sweeney Todd - Sweet Revenge Turns Bitter

Tim Burton has been making unique movies, most of them are artistic if not odd, gothic-themed, and colourful. Some of his greatest works are The Nightmare Before Christmas, Batman Returns, Sleepy hollow, Planet of the Apes, Edward Scissorhands and many more. Now he returns with his newest movie, again with Johnny Depp as the main actor, in a surreal atmosphere combined with melancholy musical tunes.

Sweeney Todd: The Demon Barber of Fleet Street is a movie adapted from Stephen Sondheim's musical based on the 19th century legend of Sweeney Todd. It is a story of a barber who returns to London from imprisonment of false charges. He returns with vengeance after his wife and daughter's suffering at the hands of Judge Turpin. He then met a widow who later helps him seek his vengeance by mutually giving him her place to become a barbershop, and in return Sweeney gave her "meat" from the dead customers which he killed for her declined pie business. The story goes until he finally get his revenge, but soon he realised that his revenge is actually a mistake (I am not going to give a spoiler for the rest of the storyline here).

Sweeney Todd is a musical drama, but don't get wrong, maybe what you think of musical drama is like The Sound of Music or Disney's Enchanted, and if that's what you think, you'll be totally wrong. Sweeney Todd is a very dark musical drama, sadistic, bloody, and full of sorrow. It was set in a dark side of London, which I would say that the atmosphere is like Sleepy Hollow or Edward's Scissorhand. Despite of excessive gore in this movie, I found it is artistic than loathsome. And the music itself is entertaining and operatic, which fits the theme.

This movie is surely another great work from Tim Burton. I love this movie for it's uniqueness, great storyline, and great musical performance by the actors. And I would recommend this movie to anyone (except children) especially who seek an alternative musical drama movie.


Download here:
http://rapidshare.com/files/99843660/Sweeney.Todd-The.Demon.Barber.Of.Fleet.Street_2007_DvDrip_Eng_-aXXo.part1.rar
http://rapidshare.com/files/99843366/Sweeney.Todd-The.Demon.Barber.Of.Fleet.Street_2007_DvDrip_Eng_-aXXo.part2.rar
http://rapidshare.com/files/99843632/Sweeney.Todd-The.Demon.Barber.Of.Fleet.Street_2007_DvDrip_Eng_-aXXo.part3.rar
http://rapidshare.com/files/99843655/Sweeney.Todd-The.Demon.Barber.Of.Fleet.Street_2007_DvDrip_Eng_-aXXo.part4.rar
http://rapidshare.com/files/99844262/Sweeney.Todd-The.Demon.Barber.Of.Fleet.Street_2007_DvDrip_Eng_-aXXo.part5.rar
http://rapidshare.com/files/99844260/Sweeney.Todd-The.Demon.Barber.Of.Fleet.Street_2007_DvDrip_Eng_-aXXo.part6.rar
http://rapidshare.com/files/99844223/Sweeney.Todd-The.Demon.Barber.Of.Fleet.Street_2007_DvDrip_Eng_-aXXo.part7.rar
http://rapidshare.com/files/99844159/Sweeney.Todd-The.Demon.Barber.Of.Fleet.Street_2007_DvDrip_Eng_-aXXo.part8.rar


27 March 2008

Interesting Facts About Computers and Tech

  1. The URL: http://akebono.stanford.edu/ used to be the original home of Yahoo!
  2. IBM holds over 25000 patents to this date, followed by Microsoft at 5000 patents.
  3. Pope Benedict XVI email is benedictxvi@vatican.va.
  4. In 2007, Facebook.com was given an estimated value of $15 billion dollars!
  5. The electricity consumed by MP3 players worldwide eclipsed the electricity consumption of mobile telephones worldwide in June of 2007.
  6. If you opened up the case of the original Macintosh, you will find 47 signatures. One for each member of Apple's Macintosh division as of 1982.
  7. Microsoft produces 42% software of the world.
  8. The average teenage Instant Messenger user has 192 contacts in his or her buddy list. The average 45 year-old has 26 contacts in his or her buddy list.
  9. In October 2007, the number of email sent per day in the world reached 183 billion messages.
  10. The technology contained in a single GameBoy Advance unit in 2000 exceeds all the computing power that was used to put the first man on moon in 1969.
  11. Today world's fastest supercomputer is Blue Gene/L by IBM. It comprises of 106,496 dual-core 700MHz processors!
  12. Bill Gates math SAT score was a perfect 800.
  13. Google has, on average, 22.4 MB of stored data about every active Internet user.
  14. Seagate introduced the first hard disk drive for PCs in 1979. It held 5 MB of data.
  15. During World War II, IBM built counting machines the Nazis used to manage their death/concentration camps.
  16. There is a three percent spike in electrical power usage at 3:00 A.M. following the second Tuesday of each month due to Microsoft-Windows based computers rebooting themselves after receiving their monthly updates.
  17. Printer manufacturers print invisible yellow dots on consumer's prints that check to see if a person is printing counterfeit money.
  18. Eidos Interactive reports that Lara Croft, heroine of their famous Tomb Raider video game series, has "died" 480 million times worldwide.
  19. Spam email accounts for 14.5 billion messages globally per day.
  20. If trends continue, by 2017, a single computer hard drive will be able to hold all the data contained on all of the hard drives currently in existence today.
  21. Average computer speed doubles about every 18 months; hard drive size doubles every year.
  22. From the smallest microprocessor to the largest mainframes, an average American depends on more than 250 computers per day.
  23. There are approximately 1,319,872,109 people on the Internet.
  24. The average computer user blinks seven times a minute, less than half the normal rate of twenty.
  25. Approximately 365 million people in the world have computers while half of the world's 6.5 billion population has never seen or used a telephone.


25 March 2008

Playing With Fire in Photoshop

In this tutorial, we will create a nice fire effect (not a font fire effect like many fire tutorials in the net) applicable for any object. Let's start new:

  1. Assume that we have two layers, one is a white background and the other is object layer (in this case I use Avatech logo). The objective is to make the logo burnt with fire.

  2. Create a new layer above the logo layer. Then draw random lines up and down using Soft Brush Tool (B), don't forget to adjust the brush size (I used 45px) and the opacity to 100%. Use dark red colour for the background (I used #C10909 colour) and bright red colour as the foreground (#FF0E0E). See image below for example:

  3. Now set the brush size to smaller one (I used 35px) and draw dark orange lines (#FE830E), this time bottom up. Then soften the fire by using a bright orange colour (#FED40E) with bigger brush size (I used 100px) and opacity around 30%. The result is image below:

  4. Using Dodge Tool (O), adjust the brush size to mid-small (I used around 35px), set the Range to Midtones and set the Exposure to around 70%. Highlight the areas which need to be brightened. See example below:

  5. Now we will make the fire looks wavy, we do this by Filter > Liquify. Use Forward Warp Tool (W) then adjust the brush size to around 40 and pressure to 40. Now use your imagination to make the fire looks more realistic. You might want to refine the details of your image by reducing the brush size to around 25 and set the lower pressure (around 30).

  6. Liquify is very good to create wavy look to your image, however it may introduce some inaccuracies, you can clean this unwanted effect by using Smudge Tool (R). Set the brush size to mid-small (around 30px) and set the Strength around 50%.

  7. Now duplicate the fire layer and move the duplicated layer below the object layer. On the bottom layer, go to Filter > Blur > Gaussian Blur. Set the Radius around 30 to 50. Then using Smudge Tool, again create a fire trail over the blurred fire layer. Improvise yourself with the brush size this time.

  8. You might want to do some finishing to this fire effect by using the Dodge Tool again and brighten the fire. Now you've learnt how to create a fire without any risk!

    Note that this fire effect looked even better if you combine it with dark background like image above.


24 March 2008

Audiosurf - An Addictive Puzzle Game You Never Seen Before

When the first time I read Audiosurf review from IGN.com, I was really not interested about this game theme. At first sight, I thought that this game is a musical game like Rock Band (which is lame in my opinion), but when I saw its screenshot, it looks like Tetris. Soon when I read the review, I got confused, what kind of game is this? It really makes me anxious to find out. Then at its official website, I found that this game is really cheap, it's just $9.95 to download!

This game is very unique, each level in this game is generated using your a music (MP3, WMA or AAC) file in your drive. After generating a level, you will be given control of a futuristic car where you have to try hit correct blocks based on your music rythym. This blocks-hitting concept is just like a combination of Guitar Hero with Puzzle Bobble or Zuma, where 3 blocks with same colour will give you some points (and there are much more other combination styles you can do). The faster your music flows, the harder the level will be. You can also change your "car" with other car type. Each car has its own special abilities and will effect the level design, e.g: Vegas car will let you shuffle your blocks collection so that it may create correct combination which will give you bonus points. In addition, you can have two player playing together using mouse and keyboard. And the best thing is that you don't have to own a super computer in order to play this game, any system which have a video card with 3D support can play this game smoothly.
After finished playing a level, you can see your high score compared to everyone that played the same song at the same level.

Personally, I've never seen a game like this before. It's very unique, creative, and very addictive (assuming you have a huge music collection in your hard drive). I would say that this game is suitable for all ages, from casual gamers to hardcore. Try this game and test your reflex now! I'm sure it will keep you busy for hours ;-p


Download here:
http://rapidshare.com/files/94237370/Audiosurf-DETONATiON-marquez.part1.rar
http://rapidshare.com/files/94248818/Audiosurf-DETONATiON-marquez.part2.rar
http://rapidshare.com/files/94260936/Audiosurf-DETONATiON-marquez.part3.rar
http://rapidshare.com/files/94271945/Audiosurf-DETONATiON-marquez.part4.rar
http://rapidshare.com/files/94273056/Audiosurf-DETONATiON-marquez.part5.rar

Here's the link for Update 1:
http://rapidshare.com/files/97531268/Audiosurf.Update.1-DETONATiON-marquez.rar

Note: You have to use virtual CD program like Daemon Tools to mount the .bin file.


23 March 2008

Create Bookmarks in Acrobat Reader

If you use Adobe Reader often, you will soon notice that some of PDF files have bookmarks (bookmark icon is shown in the left pane below Pages icon) and some (I say most of them) are not. The main problem is that the bookmarks option is actually came from the PDF file itself, you cannot create them by yourself unless you read it using Adobe Acrobat (it's the software to create PDF files from Adobe) which is very expensive. Without bookmark feature, you probably will find trouble when you are reading a PDF file which has more than 1000 pages. You may want to read two pages back and forth, but it's just too cumbersome to read them quickly as you have to slide so many pages (or maybe you can try type the page number directly, which is still slow).

One solution for this problem is by adding a JavaScript extension for Adobe Reader. This extension allows you to create a custom bookmark and easily navigate to your bookmarks even if your PDF file does not support any bookmarks. Below is the instruction to install the extension.

  1. First, you have to download this file: http://rapidshare.com/files/101662802/bookmark_page.js
  2. Make sure that your Adobe Reader is not running. Copy this file to Reader\JavaScript folder inside your Adobe Reader installation path. For example: C:\Program Files\Adobe\Reader 8\Reader\JavaScript\
  3. Open a PDF file with Adobe Reader. You will notice that inside View menu, there will be a new set of options.
  4. To add a bookmark, simply navigate the desired page then click View > Bookmark This Page. You can now type the bookmark title.
  5. To go to a bookmarked page, go to View > Go To Bookmark. Then you can select the desired bookmarked page.
  6. To delete a bookmarked page, go to View > Remove a Bookmark then select a bookmarked page from the popup menu. Or if you want to clear all bookmakrs, click View > Clear Bookmarks.
(For Programmers) This small tool is quite useful and actually simple to implement as you can see the source code inside the .js file.

There is also another alternative PDF reader software which supports bookmarking, it is called Foxit Reader.
You might want to try this software as it is small in size and fast.

Download the latest version of Foxit Reader Pro for Windows (v2.2 build 2129) here: http://rapidshare.com/files/71908014/Foxit_PDF_Reader_Pro_2.2.2129.rar

Here's a screenshot of Foxit Reader:


For more information about Foxit Reader, visit this site: http://www.foxitsoftware.com/pdf/rd_intro.php


Secret Ringtones Which Adult Cannot Hear

If you are someone who likes to change your cell phone ringtones, you might probably have heard this unique ringtones. It is ringtones which are designed to be audible for specific age range. For example, if you download one of the ringtones below which are made for 18 years old or younger, only people within that age range can hear it.

Basically, it is based on the fact that human hearing are less and less sensitive when he/she became older. Research found that people who are 18 years old or younger still can hear a sound with frequency around 22kHz. This frequency sensitivity decreases as people gets older. And if you still can hear ringtones which are intended for people below your age, that means your hearing is excellent!

Try these ringtones (in mp3 format) to test your hearing or if you want to make your cell phone rings unnoticeable by your parents :-)

Note: A good speaker is recommended to hear the sound accurately.


22 March 2008

Crisis Core: Final Fantasy VII for PSP is Finally Released

For you who are Final Fantasy or RPG fans, after long waiting time, the English version of Crisis Core is out now! It's been few months since the Japanese version is released, there has been many efforts to translate it into english, some hacker even create an English translation of this game (for menu and texts only), but now the official release is in the market! Rejoice for all of us :-)

Crisis Core is the fourth installment of Final Fantasy VII series. The game focuses on Zack Fair and Cloud Strife's story. It features a new set of combat system, new characters, intriguing story, and even it includes some scenes from Advent Children movie. Anyway, just grab your PSP and play!

Here's some screenshots of the game:


Here's the link for the game:
http://rapidshare.com/files/100927425/em-ff7cc.part01.rar
http://rapidshare.com/files/100927566/em-ff7cc.part02.rar
http://rapidshare.com/files/100927643/em-ff7cc.part03.rar
http://rapidshare.com/files/100927538/em-ff7cc.part04.rar
http://rapidshare.com/files/100927499/em-ff7cc.part05.rar
http://rapidshare.com/files/100927706/em-ff7cc.part06.rar
http://rapidshare.com/files/100928860/em-ff7cc.part07.rar
http://rapidshare.com/files/100935058/em-ff7cc.part08.rar
http://rapidshare.com/files/100935117/em-ff7cc.part09.rar
http://rapidshare.com/files/100934372/em-ff7cc.part10.rar

Password: www.pspisos.info


Create a Realistic Lightning Effect With Photoshop

Photoshop is a very powerful photo editing program, even without any extra plugins, it can create many realistic effects, one of them is this cool lightning effect. Note that this technique is actually used by photoshop professionals but it is actually very simple to follow.

  1. First, let's grab an image to be used as the background, and in this tutorial, I took the picture of a city at night from Windows Vista built-in wallpapers.

  2. Now we will create the lighting by firstly create a New Layer, then use Rectangular Marquee Tool to create rectangle marquee about this size.

  3. Create a linear gradient with Gradient Tool inside the rectangle marquee.

  4. Go to Filter > Render > Difference Clouds. Then go to Image > Adjustment > Invert. The image now should become like this:

  5. To make the lightning look more realistic, we need to adjust its levels. Do this by opening Image > Adjustment > Levels... then move the middle slider to the right to make the lightning slimmer.

  6. Let's position the image by rotating it and moving it to the desired position. You may also want to resize the image by using Free Transform tool.

  7. We need to blend the colours of the new layer with the colours of the background. We do this by setting the layer blending mode to Screen. See the image below to find out how.

  8. Now we just need to erase the lightning edges, use Eraser tool to clean the edges. Make sure that you choose Brush mode, large feathered brush size, and the opacity should be around 70%.

  9. Congratulations! You have just finished create a lightning effect, you may want to add more lightning by repeating step 1 to 8. The finished image should look like this:


21 March 2008

Canon Digital IXUS 860 IS Review

IXUS is a series of stylish cameras made by Canon, it features slim metal body, easy to use, and produce good quality pictures. Today I want to introduce one model of IXUS series cameras, it is IXUS 860 IS (also known as PowerShot SD870 IS in North American market). This camera was released in August 2007 and have been widely available in the market today.

The main features of this camera is the large clear LCD screen (3.0" with 230K pixels), Automatic face detection (up to 9 faces) and the most important, it has Optical Image Stabilisation system. The maximum resolution that this camera supports is 8.0 MegaPixels with 3.8x optical zoom and 4x digital zoom. Moreover, it also supports movie recording up to VGA (640x480) resolution up to 30FPS. About its ISO sensitivity, Canon boasts a
High ISO 1600 so that you can still get sharp image quality even in bad light condition.

Here's some pictures of the camera body:


As you can see that most of the body parts are made of metal, which make this camera quite sturdy (if not heavier). However, this camera is compact (92.6 x 58.8 x 25.9 mm) and fits your pocket easily. The back panel is quite simple as I'm sure most of you know how to operate this camera with only looking at its buttons and icons. About the camera interface, I might say that Canon cameras are the best, because it is very intuitive, fast, and user-friendly. Some of the interface idea that I like is that it automatically rotates your image whenever you move your camera vertically or horizontally, another good feature is that Canon group its camera functions perfectly, so that they are easy to remember thus you can
quickly access them.

Discussing about IXUS 860 IS image quality, I can say that it is very exceptional, it produces very little chromatic abberation and noise in almost all scene conditions.
Powered with DIG!C III image processor, this camera is undoubtedly very fast (only takes 0.9s to start up and capture first image and 2.4s to capture the next image with flash turned on). Talking about face detection, IXUS 860 detects faces quite fast altough I found it difficult to detect more than 4 faces. Moreover, thanks to good Optical Image Stabilisation system, it can produce a crisp image even when your hand shakes (Unlike Digital Image Stabilisation which virtually only boosts ISO sensitivity).

See images below for a comparison:

Canon IXUS 860 IS (With Optical Image Stabilisation ON)
Notice that it can still produce a crisp image quality without flash even in dark condition.


Samsung L730 (With Digital Image Stabilisation ON)
Notice that Digital IS still creates a blurry image in dark condition without flash.


Very good but still not perfect, this camera doesn't have a viewfinder due to large LCD, however it is compensated with good automatic brightness adjustment of the LCD which guarantees clear LCD view even at below sunlight. Another drawback is the lack of manual exposure, however the Auto mode performs quite good in most conditions therefore you won't probably need manual settings. High ISO function may not work very well after ISO 400 as noise will be noticeable, but this is still reasonable for a very compact camera.

In conclusion, Canon IXUS 860 IS is a very good compact cameras with little flaws. It is proven to be a worthy successor for IXUS 850. For a price around US$280, this camera is perfect for beginners in photography or casual users.

To see some sample images taken from this camera, click image link below:


20 March 2008

Create GIF Animation in Photoshop

I've seen many tutorial to create GIF animation using Photoshop, but most of them actually use Image Ready, which was bundled with Photoshop before CS3 version. However the current version of Photoshop no longer have Image Ready included as it is now replaced with Fireworks CS3.
However, you still can create a really nice animation using Photoshop CS3, and if you have the Extended edition, you can export your animation into a wide range of video formats such as MP4, MOV, AVI, and even FLV.

In this tutorial we will try to create a simple ball-bouncing GIF animation using only Photoshop CS3. First what you need is all the images that will represent every frame in your animation. In this tutorial, I use 8 different ball images that will represent 8 different ball position. Now you are ready to create the animation!

  1. Create a New... image and put all of your image frames into separate layer (Recomended tips: Sort it so that the earlier frame is in the bottom). Then make all layers invisible (by clicking the eye icon beside each layer).

  2. Open animation window by clicking Window > Animation.

  3. To create your first frame, make your first layer (first image) visible clicking the blank box on the left of your layer. Then assign the current frame display time by clicking the timer button (which currently should show 0 sec.) below the frame image in the Animation tab.

  4. Let's now create the rest of the frames, to do that just click Duplicate selected frames button in the Animation tab. You will see another frame is created, click the new frame. This time, change the current visible image with the image in the next layer. You can do this by hiding the current layer then unhide the next layer. Note that you may also want to change the timer for each frame. Here's the completed frames will look like:

  5. Now you've completed all frames for the animation, you need to publish it into GIF format. Click File > Save for Web & Devices... You can choose several options in this menu to optimize the image quality and size, but the important thing is to make sure that you've selected GIF as the Optimized file format. To finish, click Save and name the file. Here's the sample animation that we've just created.

If you want the source PSD file (to obtain the source images), you can download it here:
http://rapidshare.com/files/100891629/Source-BouncingBall.psd


18 March 2008

Create a Sequential Fade Effect in PowerPoint

This trick may be very simple for medium / expert PowerPoint user, but many beginners don't know about this trick, just like many of my friends.

Basically, this tutorial will teach you how to make some text or images fade in and fade out consecutively in only one slide.

Example of the result is the image below:

To create that, it is very easy, here's the steps:

  1. Select the text / image that you want to animate
  2. Go to Custom Animation (Located in Animations tab in PowerPoint 2007 or in Slide Show menu bar in PowerPoint 2003)
  3. Click Add Effect and add any Entrance effect, then change Start: to With Previous
  4. Click Add Effect again and add any Exit effect, this time make sure that Start: is On Click
  5. Go back to step 1 until you have done animating text / images
If you want to download the example file (Requires Microsoft PowerPoint 2003 or later), click this link: http://rapidshare.com/files/100435970/Sequential_fade_effect.ppt


Photosynth - A Next Generation Photo Viewer

Imagine a software that can reconstruct your photo collection into 3D images. So that you can traverse the place that you've visit one again, in 3D, with only a set of photographs of the location that you have.

Microsoft has made a tremendous effort of advanced technology these days. Photosynth is just one of their project of recreating 3D environment based on a set of digital photos as the information. Basically what it does is analysing a set of photographs (of the same location), exploring similarities between photos, creating points of depth perception that will relate current photos into 3D world. The result is that the photos collection now projected into 3D where you can seamlessly navigate your photos collection in 3D, viewing a scene in any angle, smoothly zoom a spot in your photo, and giving you a changing perspective on a world built entirely from your original photos.

Sounds great eh? Try the preview now on : labs.live.com/photosynth and be amazed!
Here's a screenshot of Photosynth:

Please note that you will need JAVA Runtime and a 3D capable graphics card to run this software.


17 March 2008

Create Simple Horizontal Line in Microsoft Word

This tips will show you how to create a horizontal line just like in HTML when you write code <hr/>. Horizontal rule is a line that span from horizontally across whole page. It is very useful when you want to separate sections or to create a divider in your document.

There are several horizontal rules that you can create using microsoft word. But to create it, you just need to type a specific character three times in a new paragraph and press Enter. Here's the details:
Horizontal Line Example
Note that this tips will only work on Microsoft Word 2000 or later versions.


15 March 2008

Create Nice Lightsaber Effect with Photoshop

Never say that you are a real Jedi if you don't know how to create your lightsaber. Now, It's time to create a lightsaber using Photoshop! With this software, you don't have to worry about finding the right crystal for your lightsaber.

Let's start:

  1. You need an image to edit, in this example, I used two Jedi wannabe warriors photo.
  2. Now create an New Layer, then use Polygonal Lasso Tool or Pen Tool to create a blade. Make sure that you fill it with white colour.
  3. Select Layer > Layer Style > Outer Glow. Select a colour to be your lighsaber colour, set the Opacity to 75%, Size to around 20px (depends on your image size), and Spread around 13%.

  4. Now, it's time to retouch the saber. Click Filter > Blur > Gaussian Blur... then set the Radius around 1.2 to 1.7 depending your preference.

  5. Now you've trained a Sith adept! Do this trick again and suit your taste to create an opposing Jedi knight. The finished photo should be like this:
I'll return with other photo editing tricks next time!